The Fastest Ways to Get Autopilot Hashes in 2025
- Jack Davies

- 1 day ago
- 5 min read
Updated: 9 hours ago

Whether you’re a solo IT admin or part of a deployment team, we’ve all been there: you’re staring at a stack of brand-new laptops that need to be enrolled in Intune, but for some reason they aren't showing up in Autopilot yet.
Instead of wasting time clicking through the entire Windows setup just to get to the desktop and run a script, you can actually grab the hardware hash right from the initial welcome screen. I've put together this quick, "no-fluff" guide to help you get those devices registered and ready for deployment without the headache.
So, what exactly is a Hardware Hash?
Before we dive into the commands, it’s worth a second to talk about what you’re actually grabbing.
Think of a Hardware Hash as the "Digital DNA" of a laptop. It’s not just a serial number; it’s a unique string of data generated by the guts of the machine, specifically the motherboard, the CPU, and the TPM chip.
Why do we need it?
We use this hash to prove ownership to Microsoft. When you upload this "DNA sample" to your Intune tenant, you’re basically telling the cloud: "If this specific piece of hardware ever hits the internet, don't let it act like a normal consumer laptop. Send it straight to our company login screen."
The coolest part is that because this hash is tied to the physical hardware, it’s persistent. You can wipe the hard drive, smash the OS, or install a fresh version of Windows, and the second that laptop sees a Wi-Fi signal, it’ll still know it belongs to your company.
Hash vs. Serial Number: Why the extra steps?
You might be wondering, "I have the serial number right here on the box, why can’t I just type that in and be done with it?"
It’s a fair question. The reality is that serial numbers aren't actually as unique as we’d like to think. Across different manufacturers and years of production, duplicates can happen. The Hardware Hash, on the other hand, is a massive, encrypted string that’s mathematically unique to that specific build.
By using the hash, Microsoft is basically doing a high-level security handshake. It prevents device spoofing, ensuring that some random person can't just guess your serial numbers and hijack your Autopilot setup. It's a bit of extra work, but it's what keeps the deployment secure.
Prerequisites:
Internet Access - If you're using the 'Direct Upload' method, make sure you have an Ethernet cable plugged in, or you are connected to the WI-FI at the start screen.
Admin Rights - You'll need an account with either Global Administrator or Intune Administrator.
Power - Keep the laptop plugged in; a TPM handshake failing because of a low battery is a headache you don't need.
Method 1 - The USB Stick Routine
This is the classic way to do it if you're processing a batch of laptops and want to upload them all at once later.
Grab the Hash:
Power on the laptop, and at the 'Welcome' or 'Region' screen, don't click anything. Press Shift + F10 to open up a command prompt.
Type 'Powershell' and hit enter.
Run the following commands:
Type 'Y' if asked.
Type 'Y' for NuGet.
Move the Hash to Your USB:
Plug in your USB drive, we need to find the 'Drive Letter' so we can talk to it.
You first need to input the below:
2. Next, input the below:

3. Now find your USB in the list and note the letter (In this example, the letter is D). Then type 'Exit'
4. You now need to copy the file to the USB, you do this by running the below:
If you get a "file not found" error, verify you saved it to the root of C: in your previous step. You can check by typing dir C:\HWHash.csv
Doing a bunch of devices? Save yourself some time and run the below instead to save directly to your USB and append the data so it doesn't overwrite previous hardware hashes.
Method 2 - The Direct Upload (No USB Required):
If you have a solid WI-FI or Ethernet connection, you don't even need a USB stick, you can add the hash, directly to you O365 tenancy.
First, Press Shift + F10 and then enter 'Powershell'
Next, run the below:
Next, a login window should appear, if this doesn't press ALT + TAB.
Now, sign in with an account with 'Intune Administrator' or 'Global Administrator', the script will use Microsoft Graph API to register the serial number.
Upload Hardware Hash to Intune:
Once you have the .csv file with your Hardware Hash, you now need to import this to Intune.
First, go to Microsoft Intune > Devices > Enrollment > Windows Autopilot > Devices

Next, click 'import' and select your 'HWHash.csv'
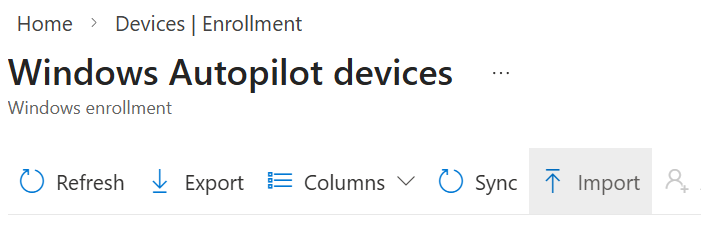
You now need to wait at least 15 minutes for this to sync over, once the device appears, you are good to go.
Wait... do you actually need to do this manually?
Before you go and slice open 50 brand-new laptop boxes and start typing, it’s worth checking with your hardware vendor (think Dell, HP, Lenovo, etc.).
Most of the big players offer a "Direct-to-Autopilot" service. Usually, if you give them your Tenant ID and Domain Name when you place your order, their factory team can inject the hardware hashes into your Intune portal before the pallets even leave the warehouse.
If they can do that for you, you can ignore this entire guide. You just hand the sealed box to the user, and the "magic" happens the first time they turn it on.
This manual method is only really for when:
You’re testing: You just need a couple of machines to make sure your deployment profile is working right.
Hand-me-downs: You’re repurposing older gear or refurbished laptops that are being brought back into the fold.
Emergency runs: You had to grab a one-off laptop from a local shop because someone’s machine died and you couldn't wait for a vendor shipment.
Troubleshooting:
Deployment is stuck:
Is the deployment stuck? If Autopilot is stuck and you want to know why, use the diagnostics script. This will give you a colour-coded list of exactly what policy or app is failing.
Error 0x800705b4:
This is usually due to a TPM issue caused by the clock being wrong. For example, if the laptop thinks it's 16:45 but it's actually 16:49, this error will appear. Run the below to fix this error:
Error 0x80180014:
If you are trying to re-deploy a laptop that was previously in Autopilot, you must delete the old device record from the Intune Autopilot list first. Intune won't let you re-enrol a device that it thinks it already knows.
"Is it managed yet?"
Do you want to see if the device has actually pulled its profile? Run the below:
Alternatively, you can check for the Autopilot marker file by running the below:
That’s pretty much the long and short of it. Manually capturing the hash is one of those "annoying but necessary" tasks we all have to do at some point. Once you’ve done it a few times, it’ll be muscle memory.


Comments